
Pro
Garment wizard & safe-zone editor
Your own blanks, your own photography, your own printable areas.
The built-in garments cover most shops, five garments on Starter and ten on Advanced. The Pro garment tools are for when they don’t: your own blanks, your own photography, your own printable areas, as many garments as you stock in your designer. This is the feature that turns My T Maker from “a t-shirt designer” into “your product designer.”
My Garment Wizard, two photos in, a garment out
My Garment Wizard builds a garment for you: upload a front and back photo of the blank, and it derives the recolorable garment automatically, print zones, your color chart, even heather textures. No photo‑editing skills required, and you can fine‑tune everything with plain‑language sliders before you save.
New to this? The My Garment Wizard overview covers what it does and which plan it is in; the rest of this page is the how-to.
Prefer full manual control? The Advanced Garment Maker is there for full manual control: build or refine every mask, shadow and print box yourself, the cleanest possible result if you have photo‑editing skills.
What you can add
Any flat-printable product you can photograph: different tee brands, tanks, totes, aprons, onesies, koozies, if it has a front, it can go in the designer.
Two ways to build a garment
- Recolorable (like the built-ins): upload a front and back solid-color mask PNG (required) plus optional shadow overlays, the designer then tints the garment live to any color on your list. More prep, best result.
- Simple photos: skip the masks-per-color work and attach a straight-on product photo per color (front, and back if you print backs). Fastest way to get a new product live.
The flow (My T Maker ▸ Garment Wizard)
- Add the garment, name it, upload the mask/shadow images or per-color photos, and build the color list: each color is a name + hex value, with an optional PMS number for exact ink matching downstream.
- Drag the safe zone, the visual editor lets you drag and resize the print-safe box right on the garment, front and back. What you mark is exactly the dashed boundary customers see, and it’s what keeps their art inside what your press can actually hit.
- Check the readout, the 📏 print-size readout and DPI warnings follow the print width you set in Settings ▸ Print area width, so keep that matched to your platen.
- Assign a WooCommerce product if you sell it through the cart (same per-garment mapping as the built-in garments, see Checkout setup).
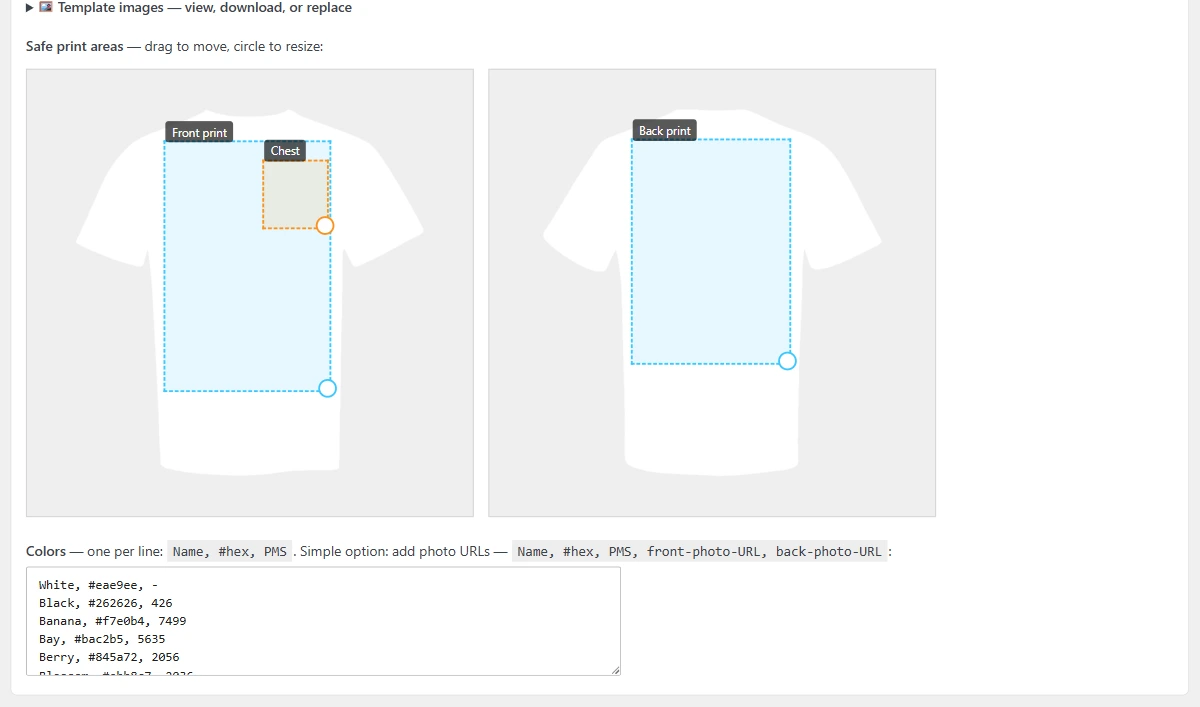
Adjusting a garment after it’s saved
A saved garment isn’t locked in. To re-cut a mask, lift a shadow that got baked into the image, or move up to a better photo, run the wizard again on the same blank and tune the sliders. Then open that garment’s card and use Template images (view, download, or replace) to swap the files in place. Everything else about the garment stays exactly as you set it: colors, safe zones, WooCommerce mapping, hidden state.
If the garment only looks too dark, try the per-garment Shadow field on Garments & Colors first. That’s a number you can change in ten seconds, not a rebuild.
Tips from the press
- Photograph blanks on a mannequin or flat-lay with even light; the designer’s color handling works best when the garment photo is neutral.
- Mark the safe zone to what your equipment truly prints, not the whole chest, honest zones save reprints.
- Hide a garment (don’t delete it) when a blank is out of stock at your supplier.
New built-in garments
I add new garments regularly and every active license gets them through normal plugin updates. Your plan decides how many are open: 5 on Starter, 10 on Advanced, all 14 on Pro. Your custom-built garments are always yours and never touched by updates.
Need a hand?
Use the contact form, answered by a working print shop within 1–2 business days.