
Selling
Checkout setup (WooCommerce)
Customers design, tap buy, and the order lands in Woo like any other, with the files attached.
Connect the designer to your existing WooCommerce cart. Customers design, tap buy, and the order lands in Woo like any other, with the mockups and print files attached to it.
Before you start
- WooCommerce installed and able to take a test order on its own.
- Any My T Maker license. Every plan can sell through the cart.
1. Turn it on
My T Maker ▸ Settings ▸ WooCommerce checkout: enable the Add to Cart button. The designer’s main button becomes your buy button (text is yours to set).
2. Products: one per garment, two if you price the back
Each garment maps to its own WooCommerce product, that’s how each garment gets its own price. Front/back pricing works the same way: an optional second product, priced for a two-sided job, used automatically whenever the design has anything on the back.
- Create a simple product per active garment (e.g. “Custom Tee”, “Custom Hoodie”), priced for a front-only print. Add a “Front & Back” version of the product if two-sided jobs cost more.
- In the same Settings section, set the Front-only product and Front & back product fallbacks (the front-only one is what switches checkout on), then map each garment under Per-garment products, a Front and a Front & Back dropdown per garment. Blanks fall back gracefully: garment Front & Back → garment Front → the fallbacks.
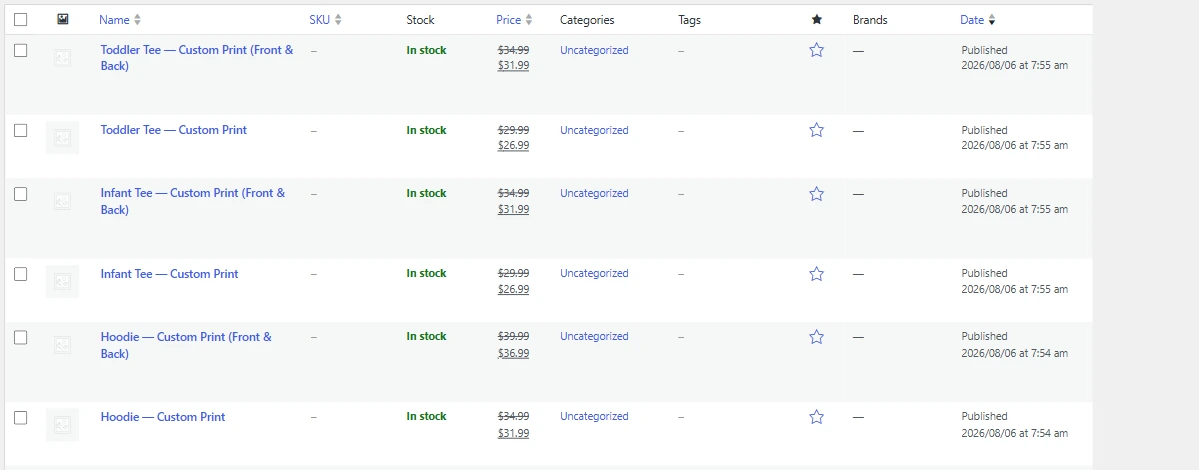
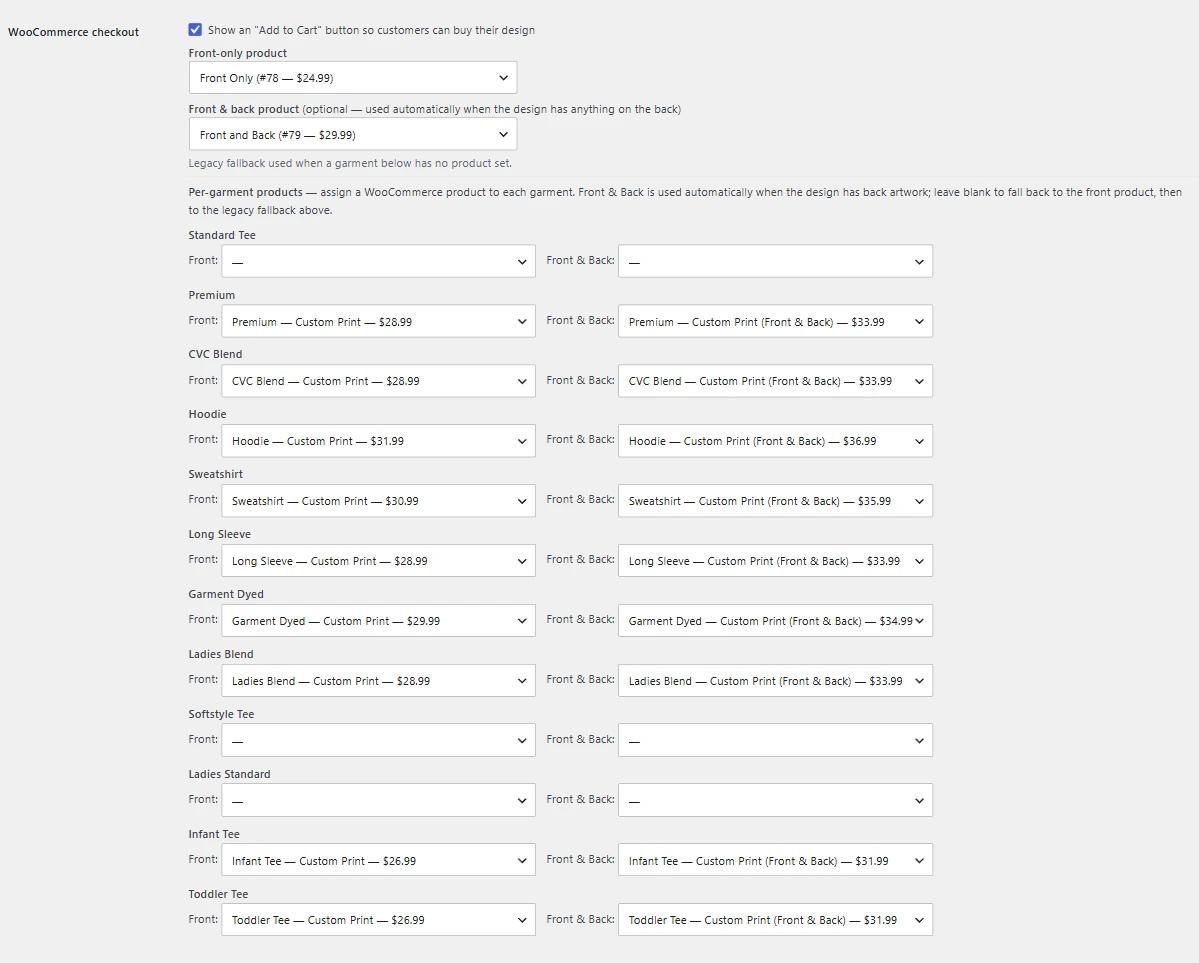
Sizes come from the Sizes offered list in Settings and ride along on the order item.
3. Test order
Design a shirt with text front and back, buy it with a test/cash gateway, then open the order in WooCommerce ▸ Orders. You should see: the line item with garment/color/size/sides, the design details, and links to the mockups and print files, and the cart showed the customer their own mockup as the item thumbnail. That attachment set is what production runs from, see Print files. (The shop also gets the print files emailed the moment a design hits the cart, even before checkout.)
Pricing tips from the press
- Price the front-only product for the everyday order; make the front & back product a clean round number. The deep pricing worksheet lives in Products & pricing setup.
- Woo coupons, taxes, and shipping all apply normally, the designer doesn’t touch them.
- Stock stays yours: hide a garment in Garments & Colors when you can’t source it.
Create Product Draft (Pro)
Pro flips the direction too: finish a design in the designer, hit Create Product Draft, and the plugin builds a ready-made WooCommerce product draft: price, mockup image and art files included. Nothing goes live until you review it and press Publish. Good for turning one-off customer work into a catalog.
Need a hand?
Use the contact form, answered by a working print shop within 1–2 business days.